Monday, April 30, 2018

How To Install and Use Docker on CentOS 7

Prerequisites

Note: Docker requires a 64-bit version of CentOS 7 as well as a kernel version equal to or greater than 3.10. The default 64-bit CentOS 7 Droplet meets these requirements.


All the commands in this tutorial should be run as a non-root user. If root access is required for the command, it will be preceded by sudoInitial Setup Guide for CentOS 7 explains how to add users and give them sudo access.


Docker Architecture:


Install using the repository

Before you install Docker CE for the first time on a new host machine, you need to set up the Docker repository. Afterward, you can install and update Docker from the repository.

SET UP THE REPOSITORY

  1. Install required packages. yum-utils provides the yum-config-manager utility, and device-mapper-persistent-data and lvm2are required by the devicemapper storage driver.
    $ sudo yum install -y yum-utils \
      device-mapper-persistent-data \
      lvm2
    
  2. Use the following command to set up the stable repository. You always need the stable repository, even if you want to install builds from the edge or test repositories as well.
    $ sudo yum-config-manager \
        --add-repo \
        https://download.docker.com/linux/centos/docker-ce.repo
    
  3. Optional: Enable the edge and test repositories. These repositories are included in the docker.repo file above but are disabled by default. You can enable them alongside the stable repository.
    $ sudo yum-config-manager --enable docker-ce-edge
    
    $ sudo yum-config-manager --enable docker-ce-test
    
    You can disable the edge or test repository by running the yum-config-manager command with the --disable flag. To re-enable it, use the --enable flag. The following command disables the edge repository.
    $ sudo yum-config-manager --disable docker-ce-edge
    
    Note: Starting with Docker 17.06, stable releases are also pushed to the edge and test repositories.

INSTALL DOCKER CE

  1. Install the latest version of Docker CE, or go to the next step to install a specific version:
    $ sudo yum install docker-ce
    
    If prompted to accept the GPG key, verify that the fingerprint matches 060A 61C5 1B55 8A7F 742B 77AA C52F EB6B 621E 9F35, and if so, accept it.
    Got multiple Docker repositories?
    If you have multiple Docker repositories enabled, installing or updating without specifying a version in the yum installor yum update command always installs the highest possible version, which may not be appropriate for your stability needs.
    Docker is installed but not started. The docker group is created, but no users are added to the group.
  2. To install a specific version of Docker CE, list the available versions in the repo, then select and install:
    a. List and sort the versions available in your repo. This example sorts results by version number, highest to lowest, and is truncated:
    $ yum list docker-ce --showduplicates | sort -r
    
    docker-ce.x86_64            18.03.0.ce-1.el7.centos             docker-ce-stable
    
    The list returned depends on which repositories are enabled, and is specific to your version of CentOS (indicated by the .el7suffix in this example).
    b. Install a specific version by its fully qualified package name, which is the package name (docker-ce) plus the version string (2nd column) up to the first hyphen, separated by a hyphen (-), for example, docker-ce-18.03.0.ce.
    $ sudo yum install docker-ce-<VERSION STRING>
    
    Docker is installed but not started. The docker group is created, but no users are added to the group.
  3. Start Docker.
    $ sudo systemctl start docker
    
  4. Verify that docker is installed correctly by running the hello-world image.
    $ sudo docker run hello-world
    
    This command downloads a test image and runs it in a container. When the container runs, it prints an informational message and exits.
Docker CE is installed and running. You need to use sudo to run Docker commands. Continue to Linux postinstall to allow non-privileged users to run Docker commands and for other optional configuration steps.

Accessing your Virtualbox Guest from your Host OS

As a developer you want to ping and access the webserver on your virtual machine. This is a very simple solution to enable the bridge to the guest VM.

Requirements

  • VirtualBox (latest version)
  • A guest operation system (e.g. Ubuntu)

Setup

  • Shut down all running VM's
  • Right click on the VM > Change... > Network
  • Open Tab: Adapter 1
  • Enable the Adapter and select "NAT"
The next step is importand to make it work:
  • Open Tab: Adapter 2
  • Enable the adapter and select: "Host-only Adapter"
  • Select Name: "VirtualBox Host-only Ethernet Adapter"
  • Click at "Extended"
  • Select the adapter: "Intel PRO/1000 MT Desktop..."
  • Select the modus: "Allow all and host"
  • Click on "Ok" to save all settings.
Yes, you have to enable two adapters at the same time to make it work. Realy. You need a "NAT" and a "Host-only Adapter".
  • Start the VM
  • Open the terminal (with Ctrl+Alt+T)
  • Enter: ifconfig
  • Now you should see a local IP addresse like: 192.168.56.104
  • The IP address is dynamic an can be different on your VM

Test

  • Go back into your host machine
  • Open the command line: cmd
  • Ping the guest VM with the command: ping 192.168.56.104
  • You should see the ping response
  • If you have a webserver installed on the guest VM then open http://192.168.56.104 in your browser to the hosted website.


What Is API Testing and Why Should We Be Using It?


Many companies are moving toward a microservices model for their software applications. This means that different sections of their application can have separate datastores and separate commands for interacting with that datastore.
Microservices are appealing to software providers because they allow components of the software to be deployed more quickly; while one area of an application is updated, the other areas of the application can continue to function.
We live in a time when users expect software to be ready to use whenever they want it, and the microservices model ensures that an application will not be down for maintenance when a user wants to use it.
Most microservices are using application programming interfaces (APIs), which are a set of commands for how a service can be used. And most APIs are using Representational State Transfer (REST) requests through Hypertext Transfer Protocol (HTTP) to request and send data.
In spite of this fact, many software testers continue to automate their testing with user interface (UI)-based tests that interact directly with the browser. This is largely due to the success of the Selenium suite of tools for test automation, which runs in a web browser.
Selenium has been available for several years, and most software testers are familiar with its use. But the most familiar tool is not always the most appropriate tool to use in test automation.
While some UI testing will always be needed to verify that elements appear on a page and can be interacted with, API tests are much faster and more reliable than UI-based tests. When testing things like adding and removing records from a database, automated UI tests can be time-consuming and repetitive. API tests allow for rapid record manipulation.
Furthermore, API testing allows the tester to find bugs earlier in the development process, often before the UI has been created. And API testing allows the tester to make requests that might not be allowed through the UI, which is crucial for exposing potential security flaws in an application.
Because changes in software happen at such a rapid pace today, it’s important to have tests that provide fast feedback for developers and testers. API tests can fill this need. We’ll describe the fundamentals of API testing, including how REST requests work and how to set up requests and assertions.


Monday, April 23, 2018

Install Maven in CentOS 7


Step 1: Add maven to the yum libraries:


wget http://repos.fedorapeople.org/repos/dchen/apache-maven/epel-apache-maven.repo -O /etc/yum.repos.d/epel-apache-maven.repo

Step 2: Install maven using the following command :


sudo yum install apache-maven


Done!


Check if maven installed correctly 

mvn -version 

Install google chrome in CentOS 7

Step 1: From Firefox Go to  https://www.google.com/chrome/


Step 2 : 


Click on "Download Chrome"

Step 3 : 

Select Download package:


For Centos / fedora / redhat  ... select 64.rpm 


Step 4:


Accept and Install


Step 5:

Save file to disk


Step 6:


Go to Downloads folder


Step 7:  right click and Open Terminal 


Step 8:
Run the following command int the terminal:

$ sudo yum localinstall google-chrome-stable_current_x86_64.rpm 


press y and enter 


Done !  google chrome is successfully installed.

Step 9 : run the google chrome using the following command
$ google-chrome


you can also run it from Application > Internet Menu


Enjoy!


Thursday, April 19, 2018

How To Install Nginx on CentOS 7

About Nginx

Nginx is a high performance web server software. It is a much more flexible and lightweight program than Apache HTTP Server.
This tutorial will teach you how to install and start Nginx on your CentOS 7 server.

Step One—Add Nginx Repository

To add the CentOS 7 EPEL repository, open terminal and use the following command:
sudo yum install epel-release

Step Two—Install Nginx

Now that the Nginx repository is installed on your server, install Nginx using the following yum command:
sudo yum install nginx
After you answer yes to the prompt, Nginx will finish installing on your virtual private server (VPS).

Step Three—Start Nginx

Nginx does not start on its own. To get Nginx running, type:
sudo systemctl start nginx
If you are running a firewall, run the following commands to allow HTTP and HTTPS traffic:
sudo firewall-cmd --permanent --zone=public --add-service=http 
sudo firewall-cmd --permanent --zone=public --add-service=https
sudo firewall-cmd --reload
You can do a spot check right away to verify that everything went as planned by visiting your server's public IP address in your web browser (see the note under the next heading to find out what your public IP address is if you do not have this information already):
http://server_domain_name_or_IP/
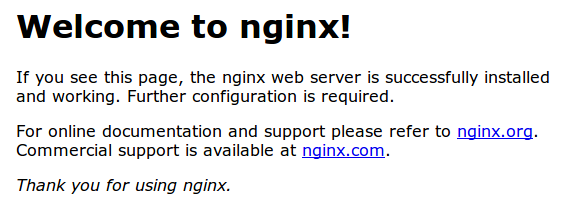
You will see the default CentOS 7 Nginx web page, which is there for informational and testing purposes. It should look something like this:
CentOS 7 Nginx Default
If you see this page, then your web server is now correctly installed.
Before continuing, you will probably want to enable Nginx to start when your system boots. To do so, enter the following command:
sudo systemctl enable nginx
Congratulations! Nginx is now installed and running!

How To Find Your Server's Public IP Address

To find your server's public IP address, find the network interfaces on your machine by typing:
ip addr
1. lo: <LOOPBACK,UP,LOWER_UP> mtu 65536 qdisc noqueue state UNKNOWN

. . .
2: eth0: <BROADCAST,MULTICAST,UP,LOWER_UP> mtu 1500 qdisc pfifo_fast state UP qlen 1000

. . .
You may see a number of interfaces here depending on the hardware available on your server. The lointerface is the local loopback interface, which is not the one we want. In our example above, the eth0interface is what we want.
Once you have the interface name, you can run the following command to reveal your server’s public IP address. Substitute the interface name you found above:
ip addr show eth0 | grep inet | awk '{ print $2; }' | sed 's/\/.*$//'

Server Root and Configuration

If you want to start serving your own pages or application through Nginx, you will want to know the locations of the Nginx configuration files and default server root directory.

Default Server Root

The default server root directory is /usr/share/nginx/html. Files that are placed in there will be served on your web server. This location is specified in the default server block configuration file that ships with Nginx, which is located at /etc/nginx/conf.d/default.conf.

Server Block Configuration

Any additional server blocks, known as Virtual Hosts in Apache, can be added by creating new configuration files in /etc/nginx/conf.d. Files that end with .conf in that directory will be loaded when Nginx is started.

Nginx Global Configuration

The main Nginx configuration file is located at /etc/nginx/nginx.conf. This is where you can change settings like the user that runs the Nginx daemon processes, and the number of worker processes that get spawned when Nginx is running, among other things.

How To Create a Sudo User (Admin user) on CentOS

Introduction

The sudo command provides a mechanism for granting administrator privileges, ordinarily only available to the root user, to normal users. This guide will show you the easiest way to create a new user with sudo access on CentOS, without having to modify your server's sudoers file. If you want to configure sudo for an existing user, simply skip to step 3.

Steps to Create a New Sudo User


Step 1:  Log in to your server as the root user.
  • $ ssh root@server_ip_address
Step 2: Use the adduser command to add a new user to your system.
Be sure to replace username with the user that you want to create.
  • $ adduser username
Use the passwd command to update the new user's password.

    • $ passwd username
  • Set and confirm the new user's password at the prompt. A strong password is highly recommended!
  • Set password prompts:
    Changing password for user username. New password: Retype new password: passwd: all authentication tokens updated successfully.

Step 3: Use the usermod command to add the user to the wheel group.
  • $ usermod -aG wheel username
By default, on CentOS, members of the wheel group have sudo privileges.

Step 4:  Test sudo access on new user account
  • Use the su command to switch to the new user account.
    • $ su - username
  • As the new user, verify that you can use sudo by prepending "sudo" to the command that you want to run with superuser privileges.
    • $ sudo command_to_run
  • For example, you can list the contents of the /root directory, which is normally only accessible to the root user.
    • $ sudo ls -la /root
  • The first time you use sudo in a session, you will be prompted for the password of the user account. Enter the password to proceed.
    Output:
    [sudo] password for username:
    If your user is in the proper group and you entered the password correctly, the command that you issued with sudo should run with root privileges.

Cheers!

Wednesday, April 18, 2018

An introduction to Tmux (terminal multiplexer)

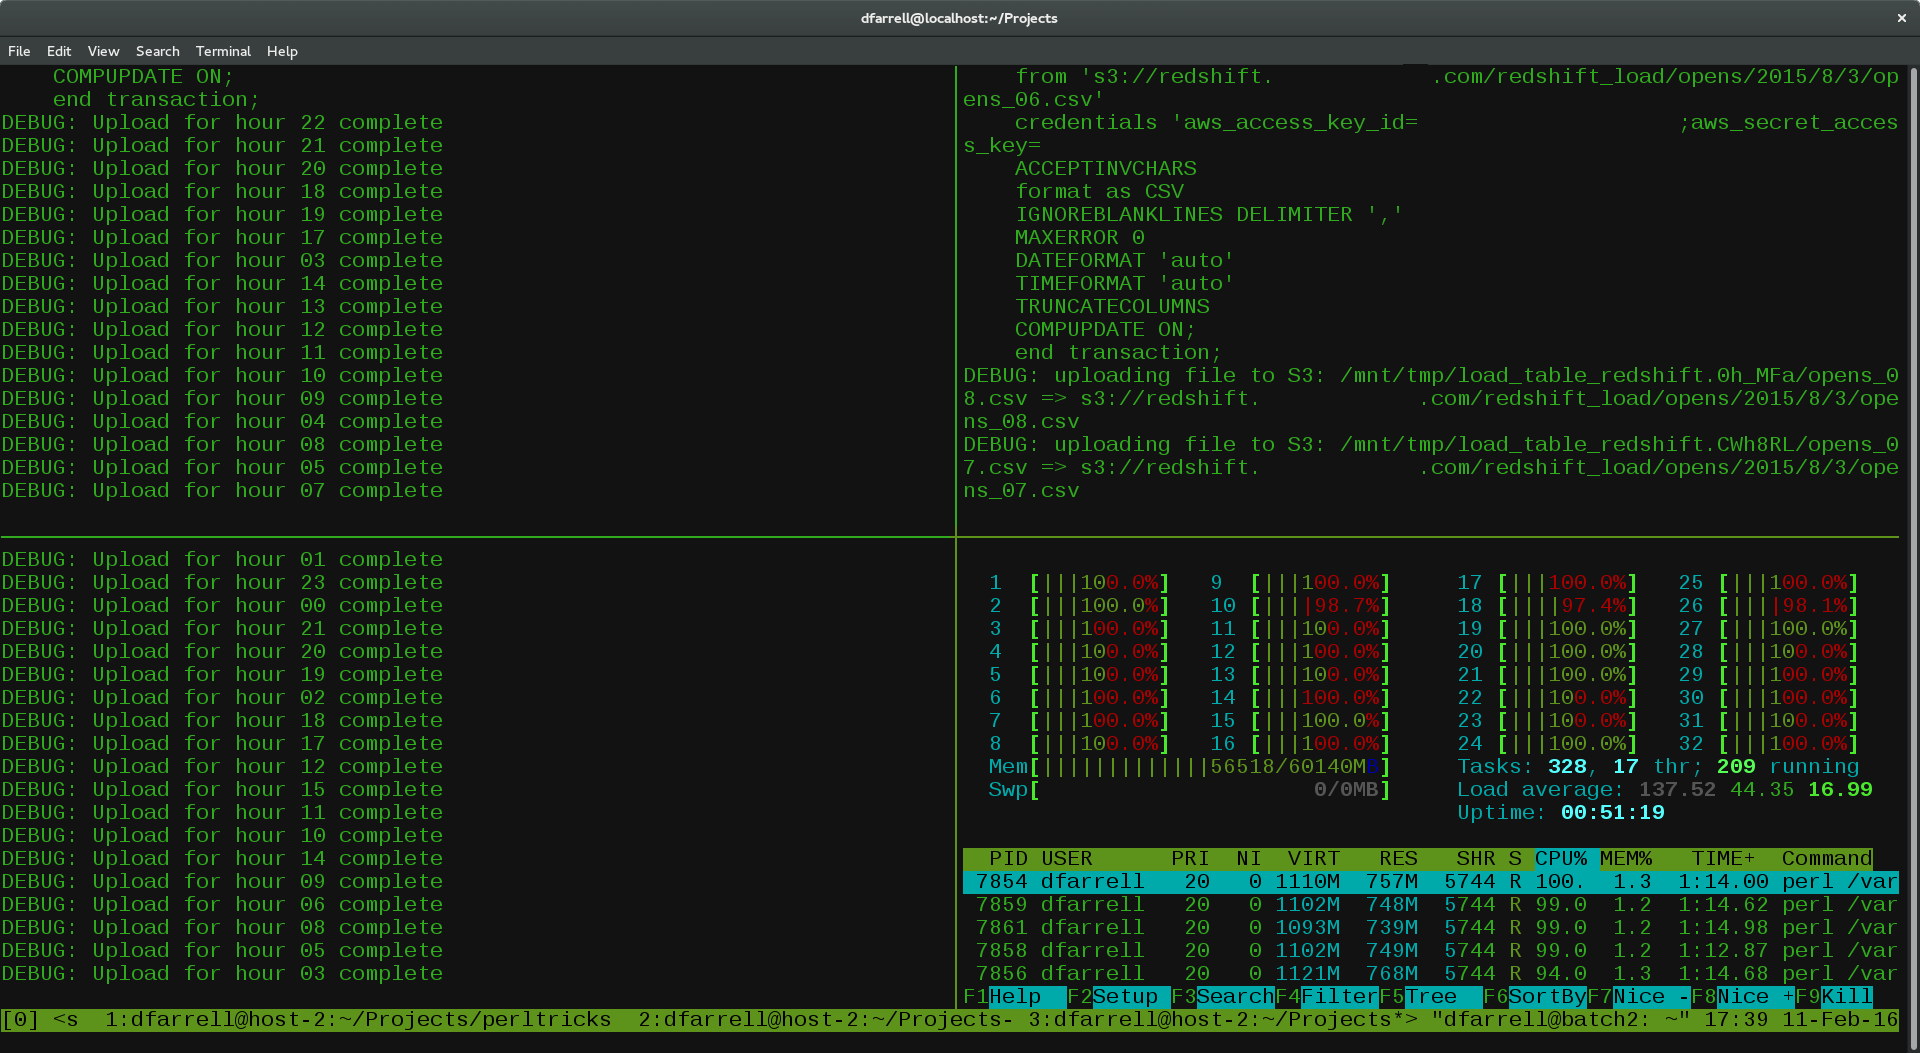
Tmux is a terminal multiplexer: it’s like a power-up for terminal programming. You can manage several terminals under a session, split terminal screens, detach and re-attach sessions and much more. If you do most of your programming at the command line, you’ll find using a terminal multiplexer invaluable.


Tmux Panes


Find more details here:
https://www.perl.com/article/an-introduction-to-tmux/

Tips:

When you open lots of terminal window it is very useful to be able to rename the Window. the default window name is big and hard to read.


Syntax :

bind-key , command-prompt -I #W "rename-window '%%'" 

E.g Ctrl +B    then comma(,)


List all the available session: 

$ tmux list-sessions                   


Kill session:

tmux kill-session -t 3


5 Strategies for Getting More Work Done in Less Time

Summary.    You’ve got more to do than could possibly get done with your current work style. You’ve prioritized. You’ve planned. You’ve dele...